Ingredients
Scale
- 3 1/2 quarts water
- 1 cup sugar (regular granulated sugar works best)
- 8 bags black tea, green tea, or a mix (or 2 tablespoons loose tea)
- 2 cups starter tea from last batch of kombucha or store-bought kombucha (unpasteurized, neutral-flavored)
- 1 scoby
- 10–12 strawberries, fresh or frozen. OR 2 cups homemade strawberry juice
Equipment
- Stock pot
- 1-gallon glass jar
- Mason jars, or other tall glass jars if double fermenting*
- Tightly woven cloth (like clean napkins or tea towels), coffee filters, or paper towels, to cover the jar
Instructions
- Bring your filtered water to a boil. Remove from heat and stir in the sugar to dissolve. Drop in the tea and allow it to steep until the water has cooled. Note* Let it cool completely! Many times I have been impatient and not done this, and my scoby ended up turning brown and dying.
- Depending on the size of your pot, this will take a few hours, letting it sit overnight to cool may just be easiest.
- Once the tea is cool, remove the tea bags or strain out the loose tea. Stir in the starter tea. Either purchase a small plain kombucha from your local store or use a previous batch as your starter tea. (The starter tea makes the liquid acidic, which prevents unfriendly bacteria from taking up residence in the first few days of fermentation.)
- Pour the mixture into a 1-gallon glass jar and gently slide the scoby into the jar with clean hands. Cover the mouth of the jar with a few layers tightly-woven cloth, coffee filters, or paper towels secured with a rubber band.
- Keep the jar at room temperature, out of direct sunlight, and where it won’t get jostled. Ferment for 7 to 10 days, checking the kombucha and the scoby periodically.
- A new cream-colored layer of scoby should start forming on the surface of the kombucha within a few days. It usually attaches to the old scoby (on top), but it’s ok if they separate. You may also see brown stringy bits floating beneath the scoby, sediment collecting at the bottom, and bubbles collecting around the scoby. This is all normal and signs of healthy fermentation.
- After 7 days, begin tasting the kombucha to see if it’s ready. I get a spoon to taste. If the ferment did not go well you will see mold, don’t drink if you see mold!
- What I look for in the taste test:
- Too sweet? It may need a few more days. Tastes too much like vinegar? It’s gone too long. You are looking for a happy balance! Sometimes, this takes practice.
- When it reaches a balance of sweetness and tartness that is pleasant to you, the kombucha is ready to bottle! If your house is on the warmer side or it is summer, the kombucha will ferment faster. If it is colder or winter, it will take longer to ferment.
- When it is ready, I pull out my scoby’s and separate the two. You will need to keep at least one scoby for your next batch. I keep mine in a small mason jar in the fridge. The other scoby I either also keep as a backup, toss, or give to a friend!
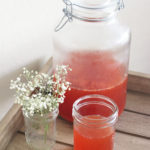
- You can either close your gallon of plain kombucha and store in the fridge to drink or pour in separate smaller bottles to add flavors, like this strawberry one! Note* You will need to keep 2 cups of plain kombucha as your starter for the next batch.
- Here’s how to add the strawberry flavor.
- Pour your gallon kombucha into smaller jars. Like mason jars or glass milk containers. This is what I use.
- Add fruit (I put about 3-4 large strawberries in each jar, fresh or frozen).
- Let sit on counter for 24-48 hours
- Spoon your strawberries out and you have a fizzy, fruity kombucha!
- Refrigerate to stop fermentation and consume your kombucha within about a month.
